  |
| All it needs is a little stack of books in there and I think I'll be happy! |

My Nightstand Solution!
A Different Kind Of Feature Wall

When we started our master bedroom makeover, we had thrown around the idea of a wallpapered
feature wall. We scrapped that idea after looking into the cost and factoring in the not-so-fun labor of applying wallpaper..Then removal if we got tired of it.
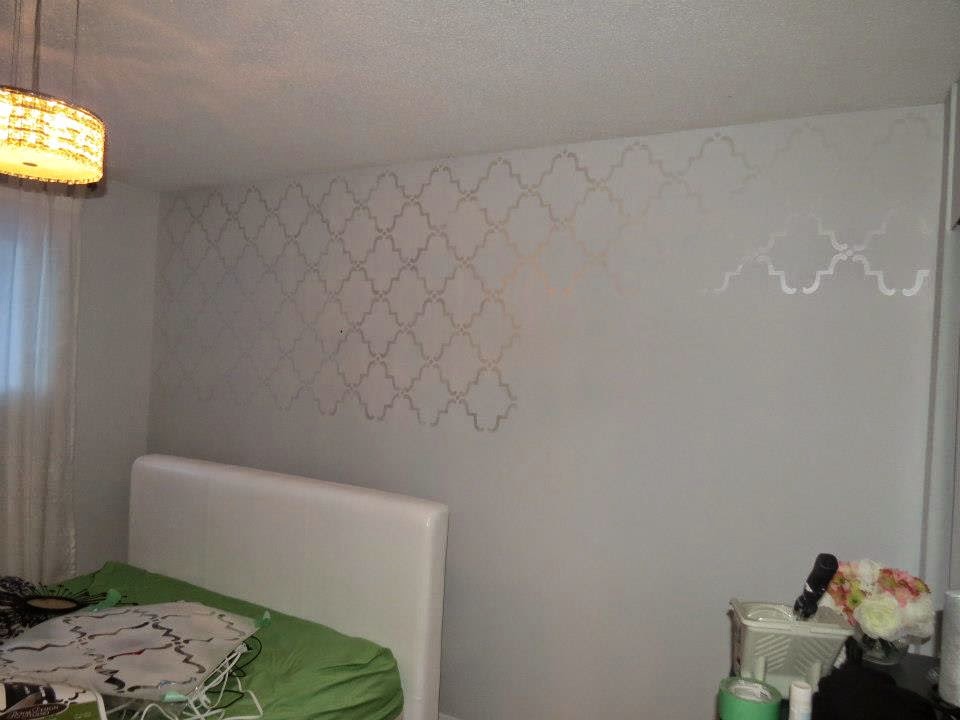
Which brings us to this. A wall stencil! Perfect! Much cheaper, easier and almost the same effect! I found a beautiful pattern on Royal Design Studio called Moorish Trellis (in large) and ordered it! I came across a metallic craft paint (Pearl White) by Martha Stewart at Wal Mart for $1.80 a bottle and bought 3 bottles.
The stencil came in the mail on a Friday. I was feeling nervous and intimidated . What if it came out crooked? What if the edges bled through the stencil?? What if I didn't line it up properly??????? How long was it going to take?!?!?! With a stomach full of butterflies, I threw a piece of tape on each side, placed the stencil in the top left corner of the wall and dove in. I used a tiny foam roller and didn't even use the whole 3 bottles of craft paint. Lining up the stencil was very easy and the paint was dry as soon as I was done rolling it, so no smudges. I couldn't believe how quick it went and the impact on the space it had! I finished in under 2 hours and I am in LOOOOVE.
In progress:
Giving Old Dressers New Life
So Greg and I have been busy with THREE beautiful little girls.. But finally decided to take a little time for ourselves and give our dark, drab room a much needed makeover. We started with some awful old dressers we picked up for 50$!
After seeing a picture on Pinterest from this blog post over at Soul Style.. I was inspired! We even used the same wall color. I was so excited to makeover our dressers. I was apprehensive about the charcoal tops, but in the end it was the right decision.
Here are the dressers before:


After seeing a picture on Pinterest from this blog post over at Soul Style.. I was inspired! We even used the same wall color. I was so excited to makeover our dressers. I was apprehensive about the charcoal tops, but in the end it was the right decision.
Here are the dressers before:


Our Retro & Owl Inspired Nursery Progress!
WOW. March is the last time I updated. lol! So funny. I have a few posts to make since then. I may make a post for Sisika's 5th birthday since the dessert table was so cute! (Back in MARCH! LOL!)
For now, so much has changed. I am due with our beautiful princess #3 in exactly 2 weeks! Her bedroom is SO close to being done and I wanted to share the progress on here.

For now, so much has changed. I am due with our beautiful princess #3 in exactly 2 weeks! Her bedroom is SO close to being done and I wanted to share the progress on here.
Here it is! <3 <3 <3


Subscribe to:
Posts (Atom)