I've been meaning to start a blog for some time, but it's been so intimidating. I have so many ideas, and so many past projects that I would love to talk about. The thought of going through years of photos and writing dozens of tutorials that I may not even remember was disconcerting.
Today, I decided to just go for it and do what I can. Maybe it will work out, maybe it won't! Time will tell, right??
So my first thing to blog about, is a lovely project that my husband and I made together for over our fireplace. I originally saw the idea on Pinterest, which linked back to This Blog.
My version of this project was done a little different than the inspiration. Mine is covered in fabric and is much larger.
The supplies that I used were:
- 6 stretched Canvasses, size 16x20 inches. (Sold in packs of 2 at Wal Mart) About 10$/pack
- Packing tape (To attach the canvasses together, but I did reinforce with wood strips/screws later) 2$/roll
- Fabric of choice (Of course you could use paint or anything else you like to cover. Paint would be cheaper and easier I imagine) I spent about 20$ on my fabric
- Fabric Tacks (Lots if you're using fabric, only 6 if you're painting) 3$/50 tacks
- Ribbon 3$/1 roll
- Wooden Letters (Paint them yourself or find them painted) I spent 4$/each letter for the large, pre painted white ones
- Hot Glue Gun/Glue
- Hammer
- Scissors
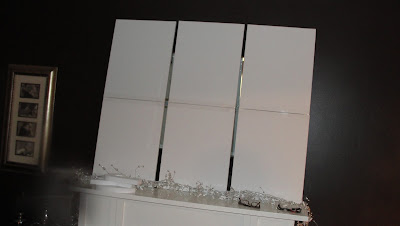
I used 2 canvasses per letter because I wanted something very tall, and something that was able to lean against the wall. Therefore, my project had to be the right height while not wider than my fireplace. After days of searching and no hope in finding super tall, skinny canvasses.. A light bulb went on. I knew 16" was the perfect width, and I was hoping for at least 36" in height. Why not attach 16x20's and make 16x40's?! Perfect.
After solving that dilemma, my husband and I began the hunt for fabric. I was picturing a silver damask to match the ornaments on the tree. After browsing FabricLand for an hour, I had almost given up hope and was ready to scrap the whole thing. That's when I saw the most beautiful Damask fabric... But it was in gold tones. *SIGH!* After looking at it for a while and my husband telling me how much he loved it.. I realized it matched our furniture, a few frames on the same wall and our accent pillows! It was meant to be!! We bought 2 1/2 yards. *Important!! If you are using fabric, make sure you get the right amount and that if will not only cover the surface of your canvas.. But also that it will wrap around all four sides and pin to the back.
Spread out the fabric and place each canvas on top. If you're using a patterned fabric, try your best to keep the pattern straight. Cut around the canvasses so that you're left with the fabric pieces, making sure to leave enough extra for wrapping.
Arrange the tacks around the edge so they are easily accessible. Start gently but firmly pulling the fabric up and over the edges. Secure with a furniture tack every few inches or so using a hammer. Fold the corners like you're wrapping a present and secure those too with 1-2 tacks.
Of course if you're painting, You get to skip the last few steps. Lucky you!! So now you'll want to decided how far down you want your letters to hang. Measure your ribbon to suit your taste, keeping in mind that you'll need a little extra for securing the ribbon to the canvas, and securing the ribbon to the letters. Cut your strips of ribbon. Attach the ribbon to each letter using a hot glue gun. Be generous with the glue, you'll sleep better at night.
Once the glue has dried, place your letter on the canvas and find the height you wanted. Fold the excess ribbon over the top of the canvas and secure with 2 furniture tacks,
Attach hanging hardware if you'd like, or simply lean your canvasses against the wall! Voila. Beautiful and bold artwork. :)


Love it!!
ReplyDelete