I love to cook and bake, decorate my home, repurpose old treasures, and create beautiful birthdays for my 3 beautiful girls!
French Toast Roll Ups
With Christmas around the corner, I've been thinking about all the yummy foods we'll be eating next month! I remember making these 2 years ago and they were such a huge hit! We did ours in Strawberry Cheesecake and Nutella flavours, but the filling possibilities are endless!
Easy DIY Ruler Growth Chart
My husband and I have been keeping the kids heights on a door frame in our kitchen for the past 5 years. We realized that when we sell this house (hopefully soon!) that we won't be taking that with us. I had seen a "giant ruler" growth chart on a Facebook yard sale page but she was charging $40 for one. I decided I would just try to make one myself instead. It was surprisingly easy and I'm SO happy with the results! I measured the existing heights on our wall and transferred them over to the growth chart. It fits perfectly on the small section of wall beside our patio doors and I love it!
Continue reading to see what you need to make your own ruler growth chart!
Labels:
cheap,
DIY,
easy,
giant ruler,
growth chart,
yard stick
Easy, Cheap and Math-Free Chevron Wall!
I was a little nervous to do this and it was a pretty spontaneous decision. After googling all kinds of instructions and blogs, I felt like maybe it wasn't something I wanted to attempt. I would need a ruler, a 6 foot level, math... Then there was the pencil lines (I hate erasing pencil lines!)..the tape etc etc. I had almost let go of the idea..but then I came across one more blog outlining a way to do this project without any of those supplies and without having to do math... It seemed too good to be true, but I jumped in head first and gave it a try. It ended up taking under 5 hours TOTAL from start to finish, and being darn close to free.
Supplies needed:
- A cardboard square in the size of your choice. The bigger the square, the bigger the stripes. I used a 10"x10" square that I cut out of a box from one of my kids board games... (shhhh!) This was free of course.
- A piece of chalk. 1 piece should do it. I have an overabundance of chalk. So also free.
- Painters tape. I used an off brand, cheap kind. I used almost a whole roll. I had half a roll handy, but had to buy more. A new roll was only 3$ and I had lots left.
- A small quart of paint. I spent 20$ on that and barely put a dent in the can.
- Small roller. I have a TON of these already, so free.
Labels:
behr,
cheap,
chevron feature wall,
DIY,
dolphin fin,
easy,
fast,
granite boulder,
gray,
grey,
no measuring,
no rulers,
paint,
painted
Old brass lamps made beautiful!
Some of my favourite things to repurpose are lamps. It's so incredibly easy and cheap to do and it makes such a big impact. Trendy and beautiful new lamps are expensive! Old, outdated, brass lamps are not.
I bought this set of lamps for 20$.
One can of spray paint for 5$.
2 new drum shades for 36$.
That's just over 60$ for 2 new lamps in exactly the style and colour I wanted. Perfect!
I bought this set of lamps for 20$.
One can of spray paint for 5$.
2 new drum shades for 36$.
That's just over 60$ for 2 new lamps in exactly the style and colour I wanted. Perfect!
Dresser turned kitchen hutch
We are constantly watching for "ugly" furniture on the local used sites. Paint and new hardware can turn an ugly piece into a stunning one! We were driving home one night through our neighborhood and saw a sign for a moving sale. My husband suggested we stop and see if they had any old dressers as we were on the hunt for a kitchen hutch for so long. We wanted something with doors AND drawers. The moving sale happened to have this one for sale and I think we paid 20$.
A Lalaloopsy Party!
Catching up on some things I've wanted to post over the last while! Our oldest turned 7 in March of 2014. We had a Lalaloopsy themed party complete with a carnival corner, face painting and an art table! It was so much fun and my oldest was thrilled! It's one of my favourite parties we've had for the kids so I was excited to post it. FINALLY I'm getting around to it!
DIY Play Kitchen From Old TV Stand!
My husband and I decided to try our hand at a TV stand play kitchen this year for Christmas! We were super excited about it and we knew our girls would freak. We started hunting for the perfect TV stand and I lucked into finding one for $20.
Here's the before and after!
Tons more pics inside the post, including progress photos, instructions, a printable, details and a full price list. :)
Labels:
before and after,
blue play kitchen,
cost,
DIY,
entertainment center,
free printable,
how to,
old tv stand,
paint color,
play kitchen,
repurposed furniture,
stove screen,
supply list,
tutorial,
tv stand
Happy Birthday, Aiyannah!
Happy Birthday, Odina!!
We went for a winter/owls theme for her party and I was so happy with how it turned out!
Party time!
Something I've been wanting to do since our oldest, Sisika started school was to throw a Halloween party for her and her friends. This year, she's in grade 1 and I finally decided we were doing it! My Mum and I put our heads together and got to planning. Luckily, she made a trip to the States the weekend of the party and found a few really awesome additions to our trick or treat table!
These were the invitations, purchased from Etsy! Sisika picked them herself and loved that the little witch looked like her! I loved the chevron.. ;)
Easy Diy Chalkboard
When we bought our house, one of the first things I wanted to do was to make a large chalkboard for the weekly menu on one of the kitchen walls. We've owned this house for 2 1/2 years, and we recently got around to doing it!
It ended up being just about free. Can't go wrong there!
Crackle Easter Eggs
My Mum came across these beautiful eggs last year on Pinterest. We made them for Easter and fell in love! We were all excited to make them again. They're so simple to make and so beautiful!
Coconut Fudge
An incredibly rich, decadent fudge full of coconut flavor and yummy shredded coconut! It's hard to stop eating! I found this recipe in the candy section of About.com while looking for birthday party dessert ideas. It's a keeper!
My Nightstand Solution!
|
|
| All it needs is a little stack of books in there and I think I'll be happy! |
A Different Kind Of Feature Wall
When we started our master bedroom makeover, we had thrown around the idea of a wallpapered
feature wall. We scrapped that idea after looking into the cost and factoring in the not-so-fun labor of applying wallpaper..Then removal if we got tired of it.
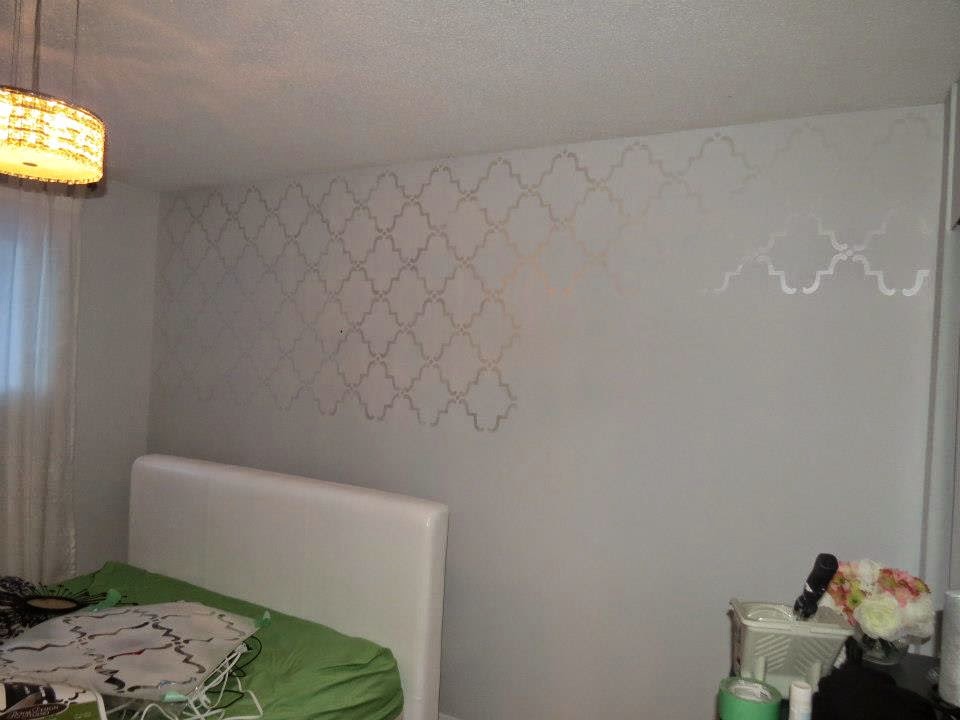
Which brings us to this. A wall stencil! Perfect! Much cheaper, easier and almost the same effect! I found a beautiful pattern on Royal Design Studio called Moorish Trellis (in large) and ordered it! I came across a metallic craft paint (Pearl White) by Martha Stewart at Wal Mart for $1.80 a bottle and bought 3 bottles.
The stencil came in the mail on a Friday. I was feeling nervous and intimidated . What if it came out crooked? What if the edges bled through the stencil?? What if I didn't line it up properly??????? How long was it going to take?!?!?! With a stomach full of butterflies, I threw a piece of tape on each side, placed the stencil in the top left corner of the wall and dove in. I used a tiny foam roller and didn't even use the whole 3 bottles of craft paint. Lining up the stencil was very easy and the paint was dry as soon as I was done rolling it, so no smudges. I couldn't believe how quick it went and the impact on the space it had! I finished in under 2 hours and I am in LOOOOVE.
In progress:
Giving Old Dressers New Life
So Greg and I have been busy with THREE beautiful little girls.. But finally decided to take a little time for ourselves and give our dark, drab room a much needed makeover. We started with some awful old dressers we picked up for 50$!
After seeing a picture on Pinterest from this blog post over at Soul Style.. I was inspired! We even used the same wall color. I was so excited to makeover our dressers. I was apprehensive about the charcoal tops, but in the end it was the right decision.
Here are the dressers before:
After seeing a picture on Pinterest from this blog post over at Soul Style.. I was inspired! We even used the same wall color. I was so excited to makeover our dressers. I was apprehensive about the charcoal tops, but in the end it was the right decision.
Here are the dressers before:
Our Retro & Owl Inspired Nursery Progress!
WOW. March is the last time I updated. lol! So funny. I have a few posts to make since then. I may make a post for Sisika's 5th birthday since the dessert table was so cute! (Back in MARCH! LOL!)
For now, so much has changed. I am due with our beautiful princess #3 in exactly 2 weeks! Her bedroom is SO close to being done and I wanted to share the progress on here.
Here it is! <3 <3 <3
Spring Is In The Air
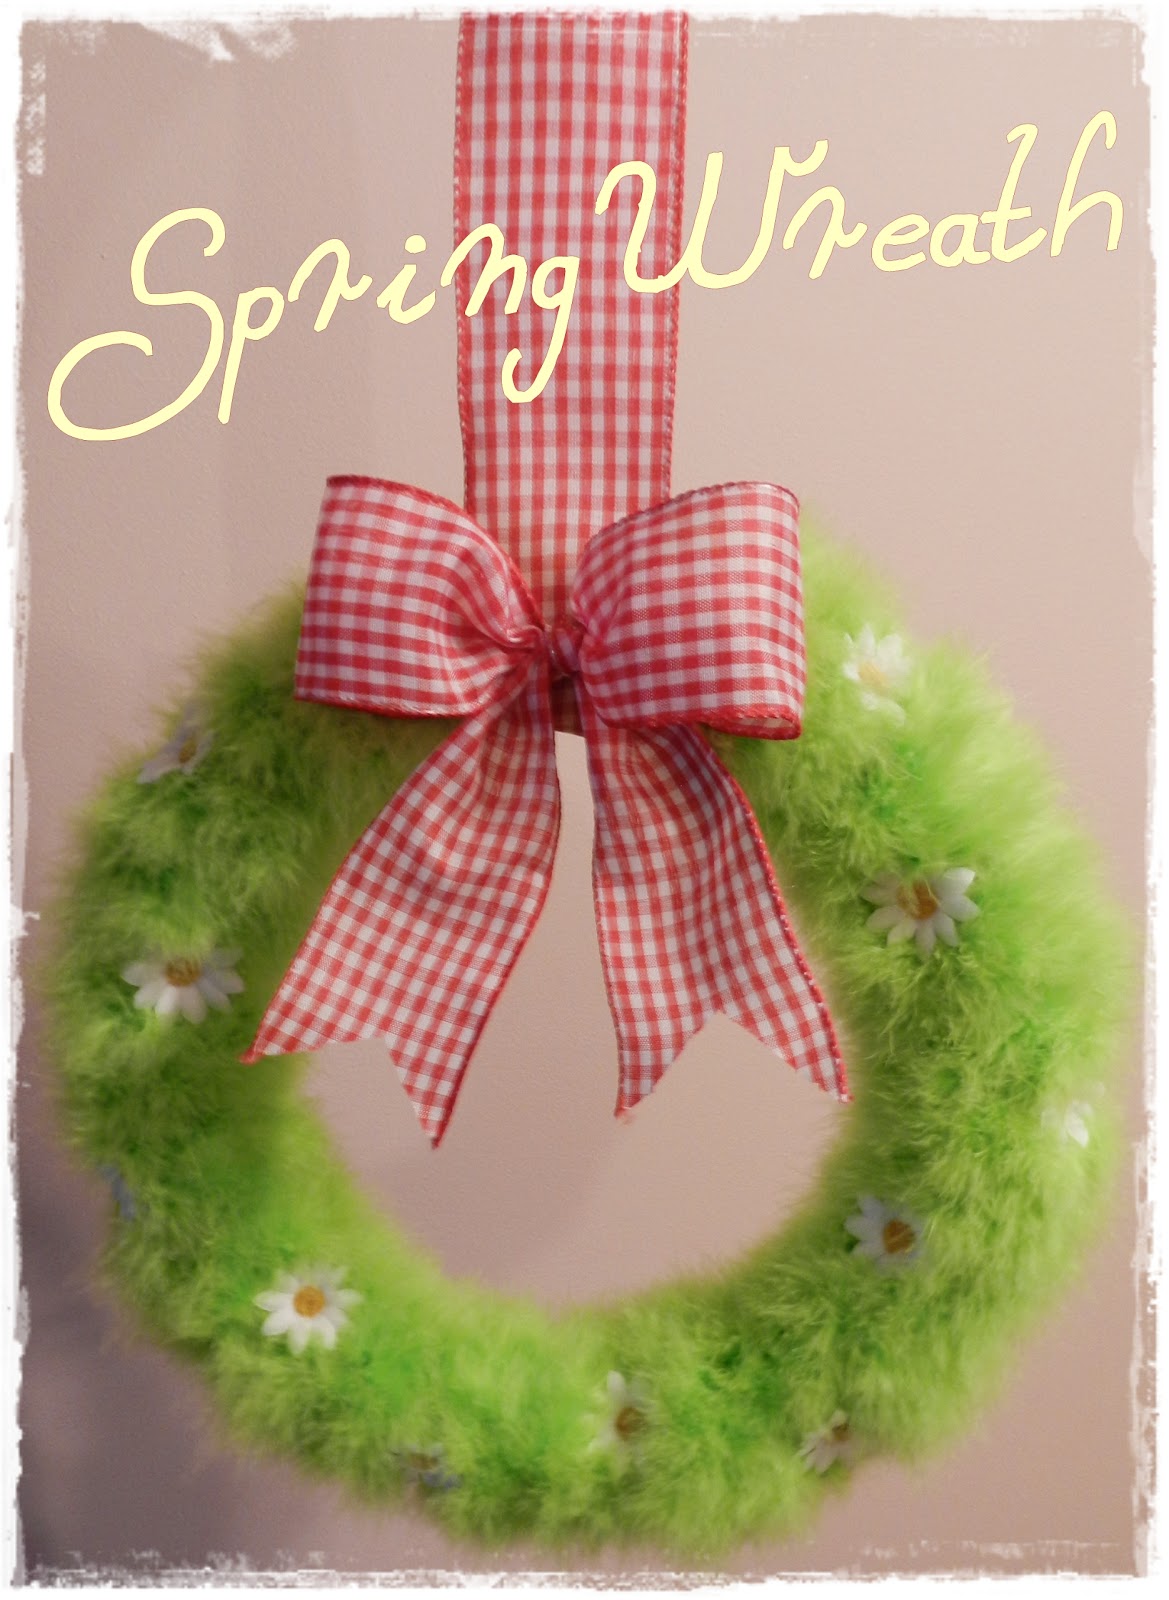
I don't know what the weather is like where you are.. But here, it's almost safe to say that Spring is here. I came across an adorable wreath on Pinterest several weeks ago that I was anxious to make. My Mum picked up all the supplies the other day and I put together attempt #1! I'd like to do a couple more, trying different colors of flowers and ribbons. Someone even suggested tucking a little birds nest in the bottom with some eggs inside!
I thought the red gingham ribbon would be cute, as it reminds me of a picnic blanket! I didn't want it too "Eastery", just something nice for spring.
Subscribe to:
Posts (Atom)